Website avatars & embed
Publish an IAMX character on a website, select one of eight templates, preview its size and copy the current widget snippet.
Before you start
Create a character in the IAMX panel, select its visual source and confirm that the intended audience can access it. Configure its voice and knowledge, test it in Avatar Studio, then save the character and scene.
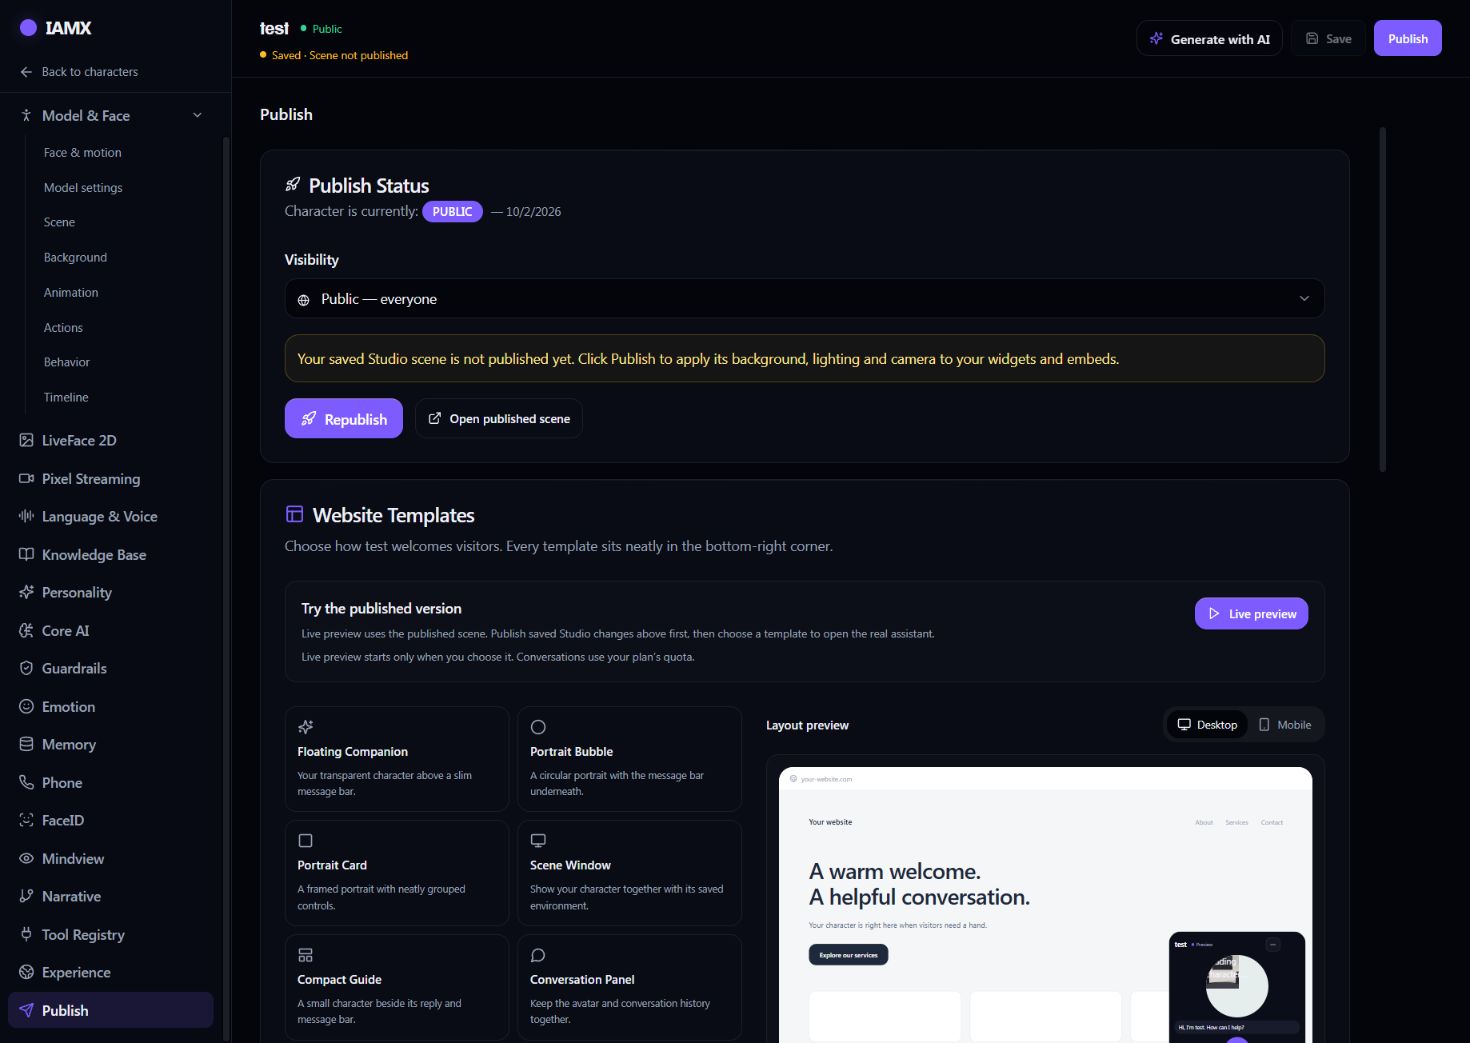
Publish a website widget
- Open Publish
Choose a website template. Click a template to see the live widget on the panel, then adjust the size and appearance.
- Test the launcher and conversation
Check the avatar picture, opening state, text input and microphone behavior. The minimized launcher opens the full character when clicked.
- Copy your generated snippet
Paste it into your website’s custom HTML or script area. Add it once per page. Replace sample IDs only with the identifier supplied for your own character.
<script src="https://iamxlive.com/iamx-widget.js"
  data-character="YOUR_CHARACTER_ID"
  data-template="round"
  data-size="balanced"
  data-open="minimized"
defer></script>| Template name | Code value |
|---|---|
| Floating Companion | floating |
| Portrait Bubble | round |
| Portrait Card | square |
| Scene Window | scene |
| Compact Guide | guide |
| Conversation Panel | chat |
| Voice Companion | voice |
| Scene Concierge | concierge |
Supported configuration
data-character selects the character. data-template selects the presentation. data-size accepts compact, balanced or comfortable. The generated snippet may also include data-size-percent and data-accent. data-open="minimized" starts with the launcher; use the panel to choose the opening behavior.
Publish the scene you tested
The character’s top Publish control saves and publishes its Studio scene, including background, lighting, camera and placement. An existing Public character remains Public; publishing a Private character makes it Unlisted. Inspect the visibility shown by the panel before sharing. Website Experience uses a separate Publish experience control.
True transparency and scene frames
The Floating Companion template renders a supported GLB character without its scene background, allowing the host website to show through. A MetaHuman delivered through Pixel Streaming includes the rendered video background; use a portrait or scene template for that path.
Mobile audio and microphone
Use HTTPS. Browsers require permission for the microphone and may require a user tap before audio can play. A tap uses hands-free mode; holding the microphone uses push-to-talk. Test both on the browsers your visitors use, including reopening the widget and returning from another app.
Troubleshooting
| Symptom | Check |
|---|---|
| Nothing appears | Confirm the CMS allows scripts and the script URL is https://iamxlive.com/iamx-widget.js. The older embed.js example is not the current loader. |
| Character cannot load | Check the saved visual source, character access and network responses. A GLB needs a reachable model file. |
| Microphone or audio is blocked | Check HTTPS, browser permission, a user interaction and the host page’s permission policy. |
| A frame is blocked | Review your Content Security Policy. Allow the IAMX script and frame origin, and the media origins used by your configuration. |
| Unexpected widget layout | Check other fixed elements and mobile viewport rules on the host website, then preview another size in Publish. |
Let the widget understand the website
Open Experience → Site guide to prepare the site map, cache visited pages, configure spoken help and keep conversation state between pages. This is separate from choosing the widget’s visual template. Follow the illustrated website guide.
Next steps
Use the Avatar Studio guide to configure animations and actions. For the rendering paths and limitations, see platform facts.
Maintained by IAMX. Updated .